Upon turning on your computer and logging in, the window that comes up is referred to as the Desktop Window. This is the Windows user interface from which you can launch any program or start any task that you would like to complete. However, you must first give the computer a command as to what you would like to do, otherwise, it sits and simply stares at you. So, understanding how to use this screen is important to get you started.
Please note that there is a table at the end of this page which gives the take away keyboard shortcuts from this lesson. In addition, if at the end of practicing this lesson you feel confident that you know the material, try our Windows Interface Quiz. What will your score be?
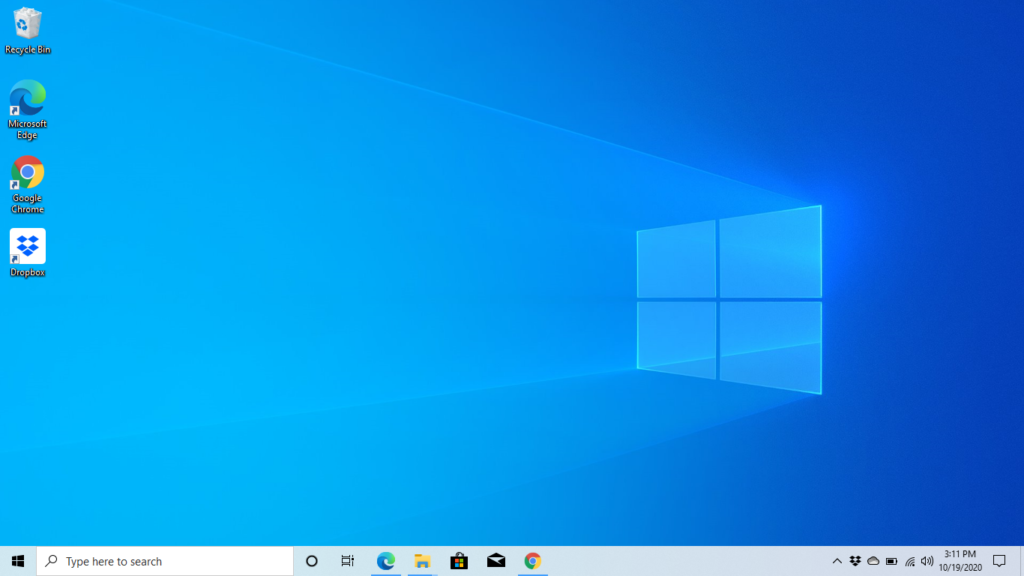
Parts of the Desktop Window
The TAB key or the F6 key will take you around the different parts of the desktop window. If you would like to explore the options within a particular section, simply use the arrow keys to go through that particular section. There are several sections you will hear encountered by your screen reader[especially with Windows 10] but there are four main sections we are interested in here: the Desktop, the Start button, the Running Applications Toolbar and the Notifications area.
The Desktop
The most obvious section of the Desktop Window is the desktop. It takes up almost all of the screen leaving just a small horizontal bar [called the taskbar] running along the bottom. It consists of icons, which basically are little pictures representing programs or files, that are organized in rows and columns. An icon for the recycle bin is usually readily there on a new machine but other icons can be added to the Desktop for easy access by the user.
We mentioned above that you can navigate through any particular section using the arrow keys, so, that also applies here within the Desktop. The left or right arrows will let you move from column to column and the up and down arrows will take you from row to row. In addition to this though, one can use first-letter or multi-letter navigation to find items on the Desktop.
What is First-Letter Navigation?
First letter navigation is a technique using the first letter of the program or file that you are trying to find. For example if you would like to launch Internet Explorer, simply press “I” until you hear “Internet Explorer” announced. If you have more than one items on the desk top beginning with “I”, just keep pressing that letter until you hear the program or file you want. After that, press ENTER to launch. This technique does not only work on the desktop, but in any list of items that you may need to sort.
The Start Button
If this button is activated with the Enter key, the Start menu will open.
The Start menu, as its name suggests, is the starting point of any task that can be completed on the computer. As with the Desktop Window, the Tab key can be used to go around the different sections of the Start Window. The sections announced by your screen reader will differ depending on your version of the Windows operating system. However, one important section for us to note is the Search Box. This is an edit field that you can use to find programs and files on the computer. As you type your search term, the computer begins to perform a search and displays results relating to what you are typing and your screen reader will inform you of the topmost result. If that which your screen reader announces is what you would like to access, then you press Enter to open it.
Let us look at an example. Say you want to launch the program Microsoft Word. If you are focused on the Desktop Window, press Tab until you hear “Start Button” and press Enter to open the Start Window. Immediately you will be placed in the search box area so you can start typing your search terms. We choose to start typing W-O-R-D. As we type, the computer will start giving results and the screen reader responds by telling us the topmost result. When we hear “Microsoft Word”, we can go ahead and press Enter. The program will then launch.
It is very important that you become familiar with at least the Search Box section of the Start Window as it is the site at which any program or file can be opened. Yes programs and files can be found on the desktop and other parts of the Desktop Window but these options are limited to what someone had gone and placed in those areas. The Start Window however is where you can access all!
The Running Applications Toolbar
The Running Applications Toolbar is usually found in the middle of the Taskbar, just before the Notifications Area. Your screen reader announces this area as the “Running Applications Toolbar” in Windows 10, but not so in Windows 11. In Windows 11, when you Tab to this section, all that is announced is the first button which is pinned there, and that is usually the Copilot button.
It consists of tabs representing programs or files that are open and currently running. In addition to these though, the Running Applications Toolbar also displays buttons that are pinned to it as mentioned above. Because they are pinned, these buttons always appear whether or not the program is actually running. They provide quick launch of programs that are commonly used. The left or right arrow keys can be used to cycle through the various buttons or tabs that are present on the toolbar. Should you want to view or open any of the items identified, simply press the ENTER key.
The Notifications Area
If you TAB once more after the Running Applications Toolbar, the next area will be the “notifications Area.” In Windows 10, the screen reader will announce “Notifications Chevron” to denote the start of this area, while in Windows 11 it will say “Hidden Icons.” The Notifications area appears to the right corner of the taskbar and displays programs that are running in the background of Windows. A sighted person would be able to look at this section and see the time and date, network connection status, speaker volume level, among other things. A visually impaired person can hear these options with their screen reader by using any of the arrow keys while focused on this section.
Pressing ENTER on the notification chevron or Hidden Icons button will bring up some additional options. While using the same arrow keys to cycle through, one will hear the additional items announced and any of these can be selected by again pressing the ENTER key.
In Windows 11, pressing Enter on some of the options in this section may open the “Quick Settings” dialogue. You can use a combination of the Tab and arrow keys to navigate this box and make changes. For example, to change the volume of your speaker, you can press Enter on volume, Tab to “Sound Output” and then use the left or right arrows to change the volume. When done, just hit the Escape.
key.
After landing on the Notifications area, pressing Tab will eventually take you right back to the Desktop. The Desktop is of course the most prominent part of the Desktop Window, remember right? Great! We have finished circling the Desktop Window with the help of the Tab key.
Some Keyboard Shortcuts
So yes we have been Tabbing around to get to the different sections of the Desktop Window. However, there are some keyboard shortcuts that can help you get to certain parts of the Window way more easily and quickly. Check them out:
- Windows + D – Go to the Desktop.
- Windows + B – Go to the Notifications area.
- Windows + A – Opens Quick Settings.
- Windows – Activates and opens the start menu.
Additionally, sighted persons are able to see at a glance the time and date on the computer. Visually impaired persons would have to navigate to the Notifications area with the Tab key and then use the arrow keys to go through the buttons in that area to eventually hear that same information. However, you do not have to do that. Here are the keystrokes:
Insert + F12 – Screen reader announces time.
Insert + F12 twice quickly – Screen reader announces date.
Need More Help?
If you have questions about this lesson, try the free BAT Accessibility Assistant. It can answer questions about NVDA, screen readers, Windows keyboard shortcuts, Microsoft Word, VoiceOver, ChatGPT, and many other accessibility topics.
Ask the BAT Accessibility Assistant
Take Away Keyboard Shortcuts
| Keystroke | Functions |
| Windows key | Opens Start/Cortana Window |
| Windows + D | Move to Desktop |
| Windows + B | Move to Notifications area |
| Insert + F12 | Screen reader announces time |
| Insert + F12 twice quickly | Screen reader announces date |
Quiz
Check how much you know and have learnt from this lesson. Take our Windows User Interface Quiz!